How to Stay Safe When Making Mobile Payments?

Published on: 12 February 2019 Last Updated on: 31 October 2024
Mobile Payments

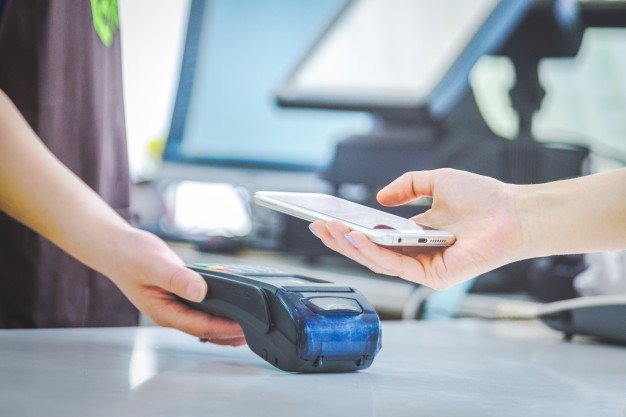
There’s no doubt that mobile payments are convenient. Just a few quick taps and your purchase is complete. And using a mobile payment is just as secure — if not more so — than other forms of payment because your personal information isn’t shared but rather tokenized and encrypted before being sent over the network.

That being said, there are still some risks associated with using mobile payments, primarily due to the fact that your payment information is stored on your mobile device. By taking a few simple precautions, you can keep your information safe and protect yourself against hackers and thieves who are after your money and your identity.

How to Stay Safe When Making Mobile Payments:

Protect Against Malware:

Regardless of the type of device you use, it is vulnerable to malware. Just as your computer can be infected by viruses and malware, so can your mobile device, and it may be days or weeks before you realize there is an issue. While taking common-sense precautions like not clicking on suspicious links (especially those that come via text). This is all about taking care with the apps you download and being aware of phishing attempts can keep your device free of malware. it’s also worth installing antivirus software. Use maximum internet security software to protect all of your devices, including your home computer, smartphones and tablets. In this way this would keep harmful programs away.

Lock Your Device:

It sounds simple, but it’s important to lock your device with a passcode. Even if your phone does fall into the wrong hands, they shouldn’t be able to access the information on it, especially since most devices will automatically lock down after several incorrect attempts. If your device offers additional security features, like facial recognition or biometrics, enable those as well.

Learn to Use Security Features:

Both Android and Apple devices include features that allow you to remotely lock and protect your device. In case, it is lost or stolen. Be sure to set up these features before something happens, and remember your login information as well. Therefore, you can lock and clear your device quickly before anything happens. Apple’s Find My iPhone service, for example, will not only give you a general idea of the location of your phone. But also allows you to remove any payment cards from your Wallet and disable any automatic logins. To restore your information when you locate the device, you’ll have to know your iCloud password. Using these features can go a long way toward keeping your data safe.

Use Credit Cards:

Credit Cards

When setting up your mobile payment accounts, use a credit card rather than a debit card. Should something go wrong and a thief access your phone, you are protected against fraudulent charges on your account if you use a credit card. If a thief accesses your debit card, he or she could drain your account of all your cash before you even realize there is a problem. Also, sign up for your financial provider’s alerts if you have a card attached to mobile payments. Most financial services companies will send alerts for transactions as they occur so you can stay on top of what’s happening.

Avoid Public Wi-Fi:

Public Wi-Fi

If you are making a mobile purchase in person, it’s reasonable to expect that the merchant is using a secure network. However, if you’re using mobile payment technology to make a purchase online. Also ensure that you aren’t on public Wi-Fi when you do so. Use your phone’s cellular network or wait until you are home on a password-protected network to avoid. After all, this would be making yourself vulnerable to hackers who watch public Wi-Fi networks for data. It is approachable that they can steal.

6. Use Trusted Apps:

Finally, any time you use your device to make a financial transaction, whether a purchase or just checking your account, use an official app rather than a browser. Apps are usually designed with layers of security built in to protect customers during financial transactions. Using a web browser to access sites, on the other hand, can leave you vulnerable to hackers. It happens especially if you are using public Wi-Fi. Be sure you only download apps from trusted sources, and do not stay logged in when they aren’t in use to keep hackers from using them to access your mobile wallet.

Using your phone to make purchases is easy and safe if you take the right precautions. Be smart about how you use your device, and you shouldn’t have any trouble.

Read Also:

Content Rally wrapped around an online publication where you can publish your own intellectuals. It is a publishing platform designed to make great stories by content creators. This is your era, your place to be online. So come forward share your views, thoughts and ideas via Content Rally.

View all posts

Leave a Reply

Your email address will not be published. Required fields are marked *

Related

android process acore

How To Fix android.process.acore Has Stopped Error? 2021 Guide

We often face issues with the devices that we use. And if the device is an android device there is a high chance that in your using time, you may have encountered some issues at some point in time. “Android.process.acore has stopped error” is one of such issues. Here I will tell you the ways of fixing this issue or “unfortunately the process android.process.acore has stopped” or getting rid of this issue with some simple steps. You will probably know in case you are facing this particular issue; this will also affect the overall performance of the device that you are using. Reason Behind The “Android.process.acore Has Stopped” Error This article is about the solutions that you can try to fix the “android.process.acore has stopped” issue. But before moving to the solution of the Android.process.acore, it will be better if you get an idea about the reason that is lying behind this issue.  Just knowing the reasons will help you to eliminate the issue to reoccur repeatedly in the near future. All these reasons may also occur some other issues of android.process.media has stopped or android.process.media keeps stopping as well.  Firmware or Operating System update not done properly. System crash. Failed Custom ROM installation. In order to restore apps, using Titanium backup. Non-compatible with the version of Android OS. Malicious virus attack. Lack of enough storage space.  How To Fix android.process.acore Has Stopped Error? Here are some easy and simple tricks to fix the issue that you are facing with the android device that you are using. Follow the below-mentioned steps to fix the “android.process.acore has stopped” issue.  1. Clear The Cache In Your Contacts Application Before we start with this step, let me tell you that this clear cache process will erase all the data. So, you need to be sure that you have prepared a backup for all the contact data. Once you are done with backing up the data, you can start the process by following the below steps.  First, you need to disable the sync on your device. Now is the time to launch the settings of your android device. Go to the Application Manager. Now search for Contacts and tap on it to open. Now, select Force Stop. Search for the Clear Cache button, tap on it.  Now go back to the menu of Application Manager. Search for contact storage and tap on it to open.  Select the option named Force Stop. Tap on the button named Clear Cache. Tap on the button named Clear Data. After you are done, restart your device. Now use your backup to restore all the contacts.  2. Reset The App Preferences When you are facing the issue of the android.process.acore has stopped and you have tried the above-mentioned trick but still, the error is still there. There is another process that you can try to solve this particular issue.  Follow this step-by-step process to fix the issue.  Open the Settings option on your device. Now go to the Application Manager. Select the option named Reset App Preferences. 3. Clear System Partition Cache There is also a possibility that you have the “android process score has stopped” error. So, clearing the system partition cache may solve the issue for you. Follow the mentioned steps. First, you need to switch off your smartphone. Press and hold the Volume up along with the Power button and Home button together. The screen will show the System Recovery mode. In order to navigate, you need to use the volume up and down key. Go to the option Wipe Cache Partition. Now to confirm, press the power button.  4. Update Your Android Software If you are done with the two processes that I have said earlier, and still the issue is there, you can try another one. Sometimes your Android device needs an update. So, updating your android device will fix the “android process acore has stopped” error.  Follow the below-mentioned steps to fix the issue.  WiFi is necessary in order to update your android device.  Go to Settings on your device. Now, go to About Phone or About Device. Now select System Update. Tap on the option called Check for Updates. Whenever there is any update is available, Tap on the Update option. After the whole process finishes, restart your device. 5. Factory Reset Your Device In case all the above-mentioned solution does not work on your favor or fail to eliminate the “android process acore has stopped” issue, the only option that you have is resetting your android device to factory settings.  This one will delete all the data along with the apps that you have installed and reset the device to the condition that it has when you first bought the phone. Follow the below-mentioned steps. First, it is important to back up all the contacts and important files that you have on your android device.  Now open the Settings option. Go to Backup and Reset. Tap on the option named Factory Data Reset. Now, tap on the option Reset Device. Follow the on-screen instructions to reset your android device. Once the process is complete, you can restore all the data that you have backed up.  Conclusion So, next time when you will face the “android process acore has stopped” error, and you can try all these tricks to fix teh issue by yourself. Though you are not a technical expert, the step-by-step guide will help you to fix the issue with some simple and easy processes. More Resources: 5 Content Ideas to Use with Instagram Influencers SEO Agencies Are the Experts at Improving Your Website Content Uncover the Benefits of Partnering with a Social Media Agency in Malaysia

READ MOREDetails
How to empty trash on android

How To Empty Trash On Android?

Most of the owners of Android have complaints regarding the Trash Folder on Android. If you have been using Android for an extended period, you must have dealt with the storage issues on your handset.  Unlike Mac or Windows, there is not any specific location that collects the trash. Hence, you need to be one step ahead while cleaning clutters on your phone.  Haven you not looked for a perfect solution to it everywhere? You might have because you are here, which means the issue is persisting. But today, you will not be disappointed anymore. In this article, we have noted small details regarding how to empty trash on android.  Do Android Devices Have A Trash/Recycle Bin? The most straightforward answer to this question is; NO, Trash Folder or Recycle Bin are not present on Android Device. That’s great because this concept has to be clear beforehand. So, I hope you can sense that in this respect, the frameworks of Mac and Windows are completely different. It is owing to the limited storage that most smartphones have. The storage can range from 8 GB - 256 GB.  Thus, it is not a viable idea to keep a folder for collecting trash from everywhere.  However, specific applications, such as Photos, carry a particular folder called Trash for lately deleted items. Thus, if you would like to eliminate junk files, you have to open each app and remove unwanted data. Below, we have presented some feasible methods to kick the junk files out from your Android device.  How To Empty Trash On Android And Optimize Its Performance? Optimizing your handset is crucial to improve its overall performance. When you purchase a new Android phone, do you expect that this can become slow like a sloth after few months? Not only you but also nobody does that. Needless to say that, trash memory in different applications on Android could be highly frustrating. It can even be your nightmare as well. To boost your device, you need to delete the unnecessary files, clean the cache of apps and empty the trash folder. Although as there no such thing called ‘Bin’or ‘Trash’ in Android, you should follow the steps below diligently to understand how to empty trash on android. 1. Clear The Cached Data The cache is a go-between data that your device saves to optimize your user experience. Nevertheless, it occupies your phone’s memory, and this, in turn, prohibits you from downloading or saving other items.  Here is how you can delete cached data from an Android Device: Go to the Storage tab under the Settings and click Cached data. You will visualize options to delete the cache. Select the ones you want to delete and follow the screen options.  Or if you want to delete the cache of individual apps, you can do it in this way: Access the Settings Hit the Apps Choose the App whose cache you wish to remove Click the Clear Cache Button, and there you go. 2. Remove The Downloaded Files This is 2nd most crucial step, which many of us forget to execute correctly. Can you remember the last time when you deleted all your downloaded files? You can’t because you have not done it over a long time.  Let me be obvious over here. Even if you do not use the downloaded files, they can still hold space in your Android’s internal memory. To clean up the storage, you require omitting them permanently from your device.  Simply navigate to the Downloads Folder from File Manager. Then choose the files you do not need to access anymore and hit the Delete option. I bet you will be awestruck to see the amount of storage it would free up.  3. Uninstall The Unused Or Rarely Used Apps It is another significant step in the roadway of ‘how to empty trash on android’. All of us have those apps on our phones that we have never used or use occasionally. Analyze whether you need them all. If not, you can clear plenty of memory by uninstalling the redundant ones.  To do this, note the steps below: Navigate to the Settings Tap Apps Select the application that you no longer require Click on the Uninstall button, and BOOM, the memory would get boosted. 4. Get Third-Party Applications Do you want to master the methodology of how to empty trash on android? Several applications are that can you can make use of to delete the junk from your device. Why don’t you try these? Let me explain to you the details before that. We recommend the most simple app to delete junk files from Android. They can access the trash files, thereby managing your phone’s storage. One such efficient application is Phone Cleaner. Install it now to augment your system’s performance.  5. Move All The Files To An SD Card If you want to know how to empty trash on android from a different aspect, this step is for you. Sometimes the internal memory of an Android falls short for several users. The best thing that you can do then is to purchase a Micro SD card. We advise you to get your hand on an SD card of higher-end in terms of storage, preferably  128 GB or 256 GB. After that, you can store all your media, documents, files here and see enjoy the speed that your phone will regain.   The Final Thoughts  We often face storage issues, phone hanging issues, and many others, but we do not know its reason. What we do at first is blame the Android brand. But unfortunately, the main culprit is Trash Files or Junk Files.  Consider cleaning your Android’s trash as a good habit and not as a task that you have to do. You can easily detect and clean junk files that you did not even know previously with these steps. More Resources: 9apps – An Alternative Other Than Google Playstore How To Fix Diagmonagent Has Stopped Error In Your Android? Recover Your Data From SD Card Through EaseUS Data Recovery Software

READ MOREDetails
Coolest iPhone Cases

5 of the Coolest Cases for the iPhone 6S

It seems like every time we turn around, there’s a new iPhone coming out. To each our own, but some of us still love our iPhone 6S. The size is the perfect fit for pockets and purses, and we’re not going to give up our headphone jack without a fight. However, for those of us who prefer the older models, it can be hard to continue to find new and trendy cases for our phones. As the iPhone continues to update its size and design, many places will start to phase out the older phone model accessories. But for those who cling to what we know and love, you can still find fun and adorable phone cases for the 6S model on www.getcasely.com. For how often we all use our phones in our day-to-day lives, they can also make fashion statements and give insight into our personalities, much like a handbag or wallet might. With so many selections to choose from, it can be hard to narrow down what type of look you may want for your handheld cellular. Here are 5 fabulous types of phone cases for the ones who stay loyal to what they know and love, no matter how many updates there may be. 1. Flower Power : Anyone who loves fashion has surely taken notice of the enduring floral trend. Harkening back to Victorian times when flowers symbolized different meanings and emotions, floral patterns have long been a popular choice for a number of accessories. Floral patterns can vary in terms of tone and personality. For example, you may opt for a soft pink orchid pattern or a bright and cheerful sunflower case. Cacti patterns have also been sprouting up all over the place. Available in any color you can imagine, florals are a classic look that doesn’t seem to be going anywhere anytime soon. 2. Marble : A more recent trend, marble has struck a chord with the millennial crowd. No longer simply used for furnishings in a home, marble has become a staple for accessory patterns. Whether you want to try out a millennial pink tint, a sleek black, or simply have that classic Grecian look, marble has taken the fashion world by storm. A perfect pattern for the self-proclaimed minimalist, marble gives a cleaner slightly more serious look while maintaining the utmost sophistication. Plus, it goes with everything. 3. Geometric : If you were a math geek in school, you may opt for a geometric pattern to give your phone a more modern touch. The most popular of these cases tend to favor the boxy shapes often consisting of squares, rectangles, triangles, or a combination of all three. Hey, even if you’re terrible at math, you can still appreciate these clean, symmetrical designs. You can also find cases that bear a softer wave pattern that may mimic the ocean or a leaf outline. Any direction you choose to go, your phone case will look as if it could adorn the walls of the MOMA. 4. Animal Print : The most common of this type is cheetah print of course, but there are also plenty of cases sporting zebra, giraffe, and even reptile prints. A pattern for the most fun and outgoing person around, animal prints are loud and pop wherever they go, giving a statement each time they make an appearance outside of your bag. 5. Food : Food. Who doesn’t love food? Everyone can relate to it and EVERYONE has their favorite kind. Some of the most popular food-centric phone cases around include pizza, donuts, tacos, sushi, cupcakes, and avocados, just to name a few. These cases are often cartoonish and bright, sometimes even including a witty pun, giving your phone a carefree and youthful appearance. Food is the best, and there is always a reason to celebrate it, whenever and wherever you want. Even on your phone. Or rather, especially on your phone. Read Also : Is Home Furnishings A Good Career Path In 2021? Is Homebuilding A Good Career Path In 2021?

READ MOREDetails