Oil Heater vs. Fan Heater: Which Is Better

Published on: 19 February 2024 Last Updated on: 01 August 2024
Oil Heater vs. Fan Heater: Which Is Better

A dependable heater may make all the difference in keeping your home warm and inviting during the bitterly cold winter months when the frigid air bites your nose. However, it might not be easy to select the best heater for your needs, given the variety of products on the market.

Oil heaters and fan heaters are two standard options, each having pros and cons of their own. This article will examine the differences between oil and fan heaters to see which is better.

Oil Heaters: The Basics

Oil Heaters: The Basics

Oil heaters also referred to as oil-filled heaters, work by heating a particular kind of oil inside the metal fins of the device. Because of the effective heat retention of this oil, the heater can continue to provide warmth long after it has been switched off.

Oil heaters give a steady, soft warmth that many people find comfortable, although they usually take longer to heat up than fan heaters.

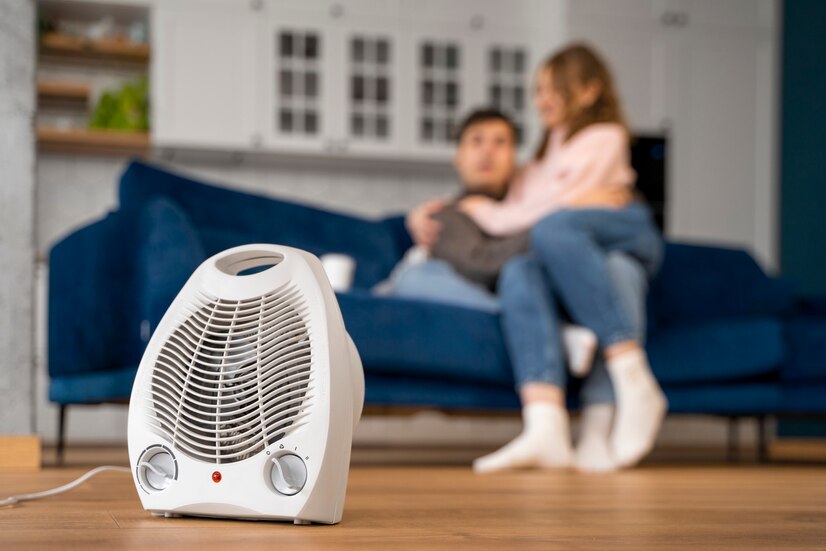
Fan Heaters: The Basics

In contrast, fan heaters operate by drawing air over a heating element and then using a fan to distribute it around the space.

Fan heaters are renowned for their ability to heat a space quickly, increasing the ambient temperature. They can, however, occasionally produce a dry heat, which some people may find less comfortable.

Here are the various considerations before you buy oil heaters online:

Energy Efficiency And Cost-Effectiveness

The energy efficiency of oil heaters is highly praised. The heater’s oil holds heat efficiently after it reaches the proper temperature, reducing the frequency of on and off cycles. As a result, there may be a decrease in energy use and, eventually, heating costs.

Furthermore, oil heaters can contribute to energy conservation by maintaining a comfortable temperature without continuously using power because they generate heat even when shut off. Meanwhile, fan heaters use more energy even though they are good at warming a space rapidly because they run continuously.

Using a fan to disperse heat is another way that using more electricity might increase. But thanks to developments in fan heater technology, more energy-efficient models with eco modes and thermostat controls have been created to help reduce energy use.

Cost Comparison

Fan heaters are typically less expensive upfront than oil heaters, which makes them the more logical option for consumers on a tight budget.

The long-term operating costs, however, must be taken into account. Oil heaters are typically more energy-efficient because they use a heating element soaked in oil, which maintains heat well and permits less frequent cycling. As a result, this may lead to decreased energy use and cheaper heating costs over time.

Improvements in fan heater technology have created more energy-efficient versions with features like eco modes and thermostat settings, which help partially offset their higher energy usage.

Consequently, even though fan heaters could be less expensive initially, the overall cost-effectiveness of the two differ based on several variables, including usage habits, energy costs, and the particular model.

Heating Performance And Comfort

Heating Performance And Comfort

Known for its capacity to deliver even, delicate warmth, oil heaters are highly recommended for use in living rooms, bedrooms, and other spaces where keeping a comfortable temperature is crucial. Many people describe the warm, comforting, radiant heat that oil heaters create as ideal for resting and relaxing.

Meanwhile, fan heaters are excellent at quickly heating a space, making them ideal for short bursts of heat in areas like bathrooms or home offices that need to be warmed up immediately. However, some people might feel that the dry heat of fan heaters is less comfortable, mainly if they use them for an extended period.

Safety Considerations

Because of how they are made, oil heaters are typically considered safer than fan heaters. The oil-filled fins encase the heating element, reducing the possibility of fire or burns from direct contact with the hot surface. Oil heaters usually have automatic shut-off systems and overheating prevention to prevent further mishaps.

Unfortunately, burn risks are increased by fan heaters, mainly when they come in contact with skin or explosive objects. Fan heaters can also be dangerous due to their exposed heating element and moving parts, so they must be positioned steadily, away from potential threats.

Read Also: What To Do When Your AC Unit Stops Working

Impact On The Environment

Due to its higher energy consumption and shorter lifespan, fan heaters typically have a more significant environmental impact. Carbon emissions are increased when electricity is used to run the fan and heating element, mainly when that electricity is produced from non-renewable resources.

Nonetheless, the environmental impact of fan heaters can be reduced by selecting and operating them wisely. Oil heaters are often seen as being more environmentally friendly. They are quieter to operate and have less emissions since they use radiant heat instead of forced air.

Fan Heaters vs Oil Heaters: In Summary

Fan Heaters vs Oil Heaters: In Summary

It’s critical to consider your unique heating requirements and preferences when choosing between oil and fan heaters.

An oil heater can be a better option if you need constant, soft warmth in larger areas, including living rooms or bedrooms. Oil heaters are excellent at producing radiant heat that heats the surrounding space gradually, making it seem friendly and suitable for rest or sleep.

However, a fan heater can be a better option if you’re searching for a rapid and effective heating solution for smaller spaces or regions that need instant warmth, such as home offices or restrooms. Fan heaters are renowned for their speedy heating qualities, allowing them to relieve chilly air and raise the room’s temperature instantly.

Make The Right Choice

There must always be a clear winner in the age-old comparison between oil and fan heaters. The ideal option ultimately relies on your preferences, budget, and particular heating demands. Each type of heater has a mix of benefits and drawbacks.

Whichever kind of heater you use, you must always take safety precautions. By researching and using your heater sensibly, you may have a warm and comfortable house all winter while consuming the least energy and having the least damaging effect on the environment.

Read Also:

Ankita Tripathy loves to write about food and the Hallyu Wave in particular. During her free time, she enjoys looking at the sky or reading books while sipping a cup of hot coffee. Her favourite niches are food, music, lifestyle, travel, and Korean Pop music and drama.

View all posts

Leave a Reply

Your email address will not be published. Required fields are marked *

All Comments

I appreciate you sharing this blog post. Thanks Again. Cool.

Related

Stunning Bathroom Vanities-min

Stunning Bathroom Vanities For An Instant Makeover

If you're planning a bathroom makeover, one of the most important decisions you'll make is selecting the perfect vanity. A vanity serves as the focal point of the bathroom and can bring the entire space together. With numerous options on the market, finding the ideal vanity can seem overwhelming. By considering a few key factors, though, you can choose a vanity that completely transforms the look, feel, and functionality of your bathroom. Why Is A Bathroom Makeover Needed? Just like any other part of the house, our bathrooms also deserve the best look. And it’s not like you have to invest in a lot of expensive fixtures that will end up with all your savings. With just a few simple tips and tricks, you can give your bathroom a nice makeover. Given below are a few reasons why your bathroom needs a makeover right away.  It Combines Value To The Abode No matter what the size of your washroom is, it still remains to be an indispensable segment of your abode. A house that has a renovated bathroom looks extremely organized, and people would want to visit it time and again. In case somebody is selling their home, an alluring bathroom will simply add up to the selling cost.  Boosts Positivity And Energy Efficiency Installing several features at the time of remodeling reduces your energy bill to almost half. Among these are underfloor heating, low-flow toilers, and excellent fixtures which save both water and electricity. Boost your home’s overall positivity by installing windows with ample light and air circulation.  A Personal Escape For Many Your bathroom is not a dump yard, it is also the place where you get some personal time to spend. After a day full of strenuous job, it should be the place that provides you relaxation and peace of mind. But in order to make a bathroom relaxing, you need to make some changes to the fixtures and lighting.  Change The Functionality  Suppose you have a small baby at home who can’t reach upto the shower. You might need to install a bathtub with warm water running on it. A bathroom makeover ensures that you change its function as and when required. The key to a great home is having an even better and multi-functional bathroom.  Steps To Build A Bathroom Of Your Dreams Getting a bathroom that you can call your own is not an overnight process. There are various steps included that lead you to your destination, and today we are talking about a few important ones: Size Is Essential Before diving into vanity options, carefully evaluate the available space in your bathroom. Take accurate measurements of the area where the vanity will be placed. Consider the width, height, and depth, as well as any obstructions such as doors or windows. Think about clearance for the doors and drawers in the vanity as well. These factors will help you figure out the appropriate size and configuration for your vanity. With so many choices available from companies like Unique Vanities, finding one that's the right size without sacrificing other features shouldn't be difficult. Explore Vanity Styles Every bathroom is unique, whether it's modern, traditional, rustic, or eclectic. Choose a vanity that fits in with your design theme. Consider the materials, finishes, and design elements that will meld with the overall aesthetic of the space. For example, a sleek and minimalist vanity with clean lines is perfect for a modern bathroom, whereas a vintage-inspired vanity with intricate detailing may foster a traditional or farmhouse style. Consider Your Storage Needs Storage is a crucial aspect of any bathroom vanity. Evaluate your storage needs based on your daily essentials, such as toiletries, towels, and cleaning supplies. Determine whether you prefer open shelves, cabinets, or drawers for storing these items. If space is limited, opt for a vanity with clever storage solutions like built-in organizers or hidden compartments to maximize functionality. Having enough storage space and organization solutions will help you make the most of a bathroom makeover. Choose The Right Materials Materials play a significant role in a vanity's durability, maintenance requirements, and appearance. Popular options include wood, engineered wood, laminate, glass, metal, and natural stone. Wood offers a warm and timeless appeal, while glass gives off a sleek, elegant air. Consider factors such as moisture resistance and ease of cleaning when selecting the material. Engineered wood and laminate may be less costly, but they may sustain damage when exposed to moisture as they would be in a bathroom. Additionally, ensure that the materials you choose complement the other fixtures and finishes in your bathroom. Think About Sink Types Sinks are essential components of vanities and should be chosen carefully. Determine whether you prefer a single sink or double sink, depending on your usage and the available space. Choose a sink style that complements the design of the vanity. Options range from under-mount and vessel sinks to integrated versions. Consider factors like ease of cleaning, functionality, and visual appeal when making your selection.  Stick To A Statement Mirror A mirror in the bathroom says a lot. In this case, you get enough liberty to choose a mirror size of your choice. There’s oval, there’s flat, there’s a pentagon, and so many more options available. You just need to find the one. It acts as more than just equipment added for your primping skin routine. Such an enormous reflective surface also leads to the illusion of an ever larger space.  Making Your New Bathroom Pop Choosing the perfect vanity for a bathroom makeover requires careful consideration of space, style, storage needs, materials, sink types, and many other factors. Explore various options to help you find a vanity that meets your needs while enhancing the appearance of your bathroom. Remember, the right vanity can be a transformative element in your bathroom makeover, creating a beautiful and functional space that you'll enjoy for years to come. Give your children and your significant other what they can call their own. Read Also : Mirror Decorating Ideas To Style Your Bathroom Using Feng Shui In Your Bathroom Design The Different Kinds Of Toilets

READ MOREDetails
Iron Clothes

How to Use Iron Clothes With Steam

Believe it or not, the amount of people that don’t know how to iron clothes is amazing. There’s no shame on it since most of us were thrown into society without really practicing skills that would definitely help us fight back as we become independent. These skills include things like cooking a proper meal before going to work, knowing what groceries to buy without spending all our money on unnecessary things, being able to pay bills accordingly without becoming a mess, cleaning the house every now and then, and of course, knowing how to use steam irons and what to do to properly iron our clothes to not look like folded toilet paper. Don’t worry though! In this guide, I’m going to teach you the essentials of how to iron, and how to deal with different types of fabric. To be honest, ironing is not something as complicated as many think. It’s all about knowing what to do, which is what most people lack. The process may require a little preparation and patience, though, so be prepared to practice with different pieces of clothing to get the main idea. One thing is sure, though. You have to be careful when using an iron because they can be harmful if dealt with without precautions! How to Prepare for It The first thing you’ll need is a flat surface where you can prepare your clothes to be ironed. Try to have everything neatly organized to avoid possible accidents, and if you can, try to do it on an ironing board. Some clothing is too delicate for the heat produced by the heated metal of the device, so have a piece of fabric to protect these. Read more: A Complete Guide on Using IRON on Transfer Paper Connect the Iron Irons can take some time before they are ready to be used. They usually show a sign that they are ready, so be sure to be attentive about them while you take care of the next step. Never try to do it before its ready, since it’ll lead to a slower and far less efficient process. Know the Differences Between Materials, and Sort Them Beforehand Depending on the type of fabric you are dealing with, you might want to change your approach while ironing. You can’t deal with a silk piece the same way you would deal with a cotton one, for example. Some pieces of clothing will require you to use the lowest setting of heat possible, while others may require even more heat. Separate silk, wool, rayon, and acetate to be dealt with the lowest settings. Wool clothes may require the protection of another piece of fabric that was previously dampened, so take that in mind! For polyester, go with the medium heat setting, and for cotton, you can go either medium and high heat setting. Both of them should be dampened to be protected from the heat. Before the iron is ready to go, you should have them sorted out. How to Iron Clothes When you deal with shirts with a collar, you should start with it. You can start with a pattern that follows the inside part of the collar, starting from the center of it, until you reach the edges. Then, fall back to the center, and keep moving between both sides. Once you’ve finished with it, you can work the outside. Lay down the shirt in a way that you can flatten it with the iron with simple movements. After that, you have to work your way down, slowly moving the shirt. Then, work the sleeves then the cuffs. Pants are much easier than shirts with a collar. You just have yo lay them down in a way that you can work both legs at the same time. Start with the waist, gently work with the pockets, and go your way down. Repeat the process until you are satisfied with the results, but make sure to be gentle and careful with the heat and the ironing. Considering that there are way too many types of clothing to teach all of the proper methods and techniques to iron them accordingly, you should check this guide on how to do it without fail. Safety Recommendations Ironing can be a pretty dangerous process if you are not attentive while you do it. If you don’t take safety measures, you might harm yourself or others, so make sure to pay attention to this part of the guide. The very first thing you should always make sure is that the iron is unreachable for children. Children can be curious and do things without knowing, so you will be the one to blame if you allow them to get closer while they are heated up. This is important even after you’ve finished ironing. These devices tend to remain heated up even after disconnecting them, so you should still be attentive to any possible situation. I recommend you to wait at least 10 minutes before taking your guard off. Remember to check just in case. While it rests, don’t leave it face down. You might burn something or damage the iron if you do. If an accident happens and you burn yourself or someone else gets burned, treat the burn with cool water for as much time as you can. 20 minutes should be more than enough. Don’t use things like butter or oil, since it might infect the injury. if the burn is too big, you should check yourself with a doctor. Read Also: How To Choose A Washing Machine? How to Pack Clothing Properly for Shipping Choose The Latest Collection Of Women Clothing For a Stylish Look 6 Benefits Of Buying Clothes Online – Why People trust online shopping

READ MOREDetails
Mounted Glass

Create Wall Mounted Glass Shelves with Custom Cut Glass

Mounted Glass shelves are very handy in improving the interior décor of your space in a classical manner. Glass shelves have been in use for many years now and technological advancement has led to the generation of advanced glass version with more desirable features and greater strength. This implies that glass materials today can support more weight and withstand higher pressure than earlier pure glass versions. One important feature of glass shelves is that they can fit the walls of rooms and there are many designs from which one can pick from. The main consideration when choosing the best wall mount glass shelf design is the purpose of the shelf as well as where and how the shelf will be mounted to the wall. This paper discusses the various designs of wall mount glass shelves that can be created using different custom cut glasses. The shape of Glass Shelves The glass shelves can be made with glass cut in different shapes. Rectangular and square glass shelves are the most common. Rectangular glass shelves can be installed in various places like the bathroom, in the living room, kitchen, office, and in the bedroom as well. Square shelves are mostly installed at the corners of rooms to provide sufficient anchoring for shelve. There are also specific shapes of glass shelves designed specifically for installation at corners. They include triangle, corner pentagon, and quarter circle glass shelves. It is important to consider the purpose of the shelf when choosing the glass material for the shelf to ensure the material chosen can support the required load without breaking. Glass shelves can also be L-shaped and these are fit into or onto corners of rooms. There are many types of glasses to choose from for wall mounted glass shelves. Tempered glass is the commonly used type of custom cut glass for glass shelves. This type of glass is hardened to increase durability and resistance to high temperature and pressure. Tempered glass also breaks into blunt square pieces that are less likely to injure people as opposed to angled sharp pieces obtained when ordinary glass breaks. The other suitable glass type for wall-mounted glass shelves is the acrylic glass. Acrylic glass consists of a very transparent material that allows the glass to allow more light to pass through it than normal glass. The downside of acrylic glass is that it scratches easily but the scratches can be removed by buffing. Other types of custom cut glasses suitable for glass shelves are low-iron glass, textured or frosted glass, as well as colored glass. Various Types of Mounted Glass Shelves Uses         There are also various wall-mounted glass shelf designs dependent on the shape of the horizontal cross-section of the glass. Some glass shelves are bent like the eclipse and triumph shelves. Eclipse glass shelves are slightly curved forming an arc while the triumph glass shelves have a bookend on one end, and are designed for keeping books and magazines. Another glass shelf type is the Fiora glass shelf which has a straight surface like the rectangular glass shelf. Fiora glass shelves are available in clear and colored glass materials. The other type of glass shelves is the Roya glass shelf which is simply rectangular in shape. Bent glass shelves are very decorative and are mostly used in the bathroom for keeping light-weight objects. Installation or Mounting to the Wall      The glass shelves can either be mounted directly into the wall of the building or attached using brackets. Glass shelves with straight edges are the most suited for direct fixation into the wall of the building. When fixing glass shelves directly to the wall, a groove is first to cut into the wall using a chisel and hammer if the wall is masonry. The glass shelf is then fixed into the groove and a suitable adhesive applied to stick the glass to the wall. The other types of glass shelves are attached to the wall using brackets. The brackets are made of a strong durable material like stainless steel. Brackets are screwed or riveted to the wall and the glass shelves fixed to the brackets. Other types of glass shelves can be mounted to a frame which is then fixed to the wall. This type of glass shelves is manufactured as a set that is first connected together then fixed to the wall. Mounted Glass shelves can also be hanging at the top. This type of glass shelves is referred to as the hanging glass shelves. The shelves are fixed to a frame that is suspended from the top of the building. Hanging glass shelves are manufactured as a set in the factory and are suitable for rooms where the wall is not strong enough for mounting the glass shelves directly to it. Also, when the walls are filled with other things, using the hanging glass shelves provides extra space for storing stuff. Choose the Right Glass Thickness As stated in the introduction, the intended purpose of the glass shelf and where it will be installed determines the type of glass material that will be used. The material chosen should be strong enough to support the anticipated load. The thickness of the glass also determines its ability to support a given weight with thicker glass shelves being able to support higher loads than thinner glass shelves. It is also crucial to consider the material that makes up the wall on which the shelf will be mounted as it has a direct relationship to the weight that the shelf can support. Brackets should be attached to hard materials like concrete, or masonry walls to ensure maximum strength. Mounted Glass shelves have many designs from which people can choose from. In addition to providing more storage space, glass shelves including bent glass shelves, add aesthetic value to a room making it possible to display one’s collections with ease. The shelves allow light to pass through them helping to maintain the room well-lit which helps to brighten the mood of the place. One can also consider finishing the corners of the shelves in different shapes to make them more stylish and appealing. When installed properly, glass shelves match perfectly with any interior design theme. Read Also: 7 Unexpected Ways to Use Glass and Wood for your Home 10 Fabulous Ways to Update Your Home Interior Using Wallpaper

READ MOREDetails