Hearing Aid Devices: The Ultimate Guideline

Published on: 13 April 2021 Last Updated on: 30 December 2024
Hearing Aid

Hearing loss is one of the most emerging issues in the world right now!!

There are no age boundaries for developing this condition. And you must have seen many people wearing a device on their ears.

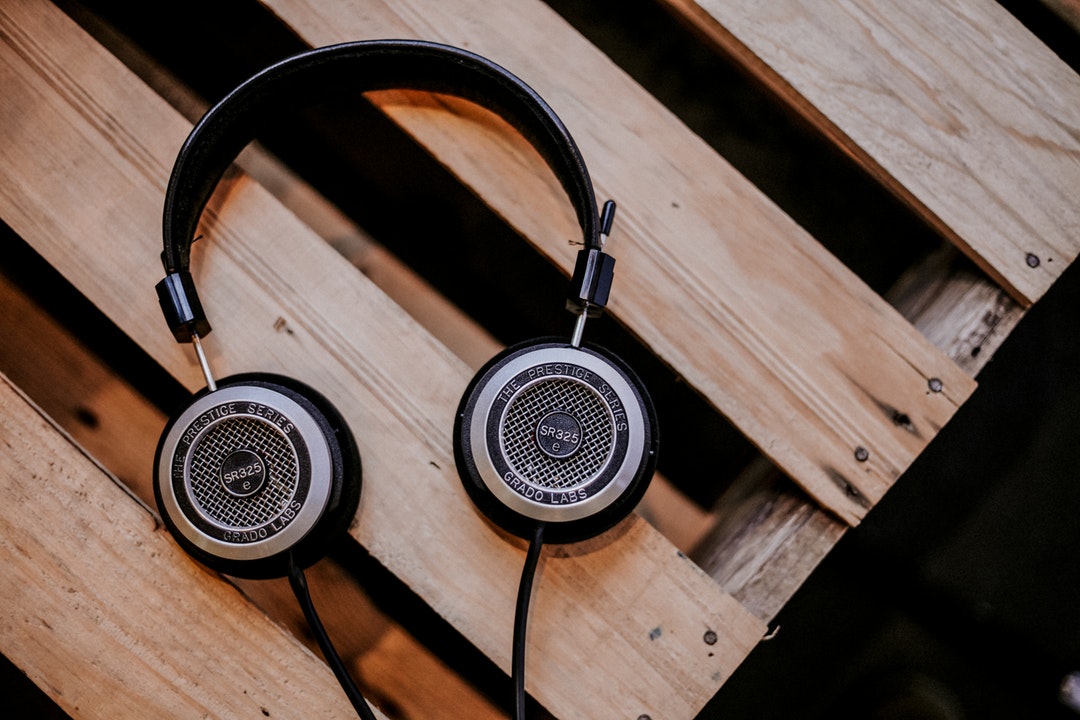
-Yes, like earphones!!!

But those are not earphones. Instead, those are hearing devices people with mild or severe hearing loss use.

Deafness, partial deafness, or sudden hearing loss disable people from hearing to sudden sound frequencies.

Researchers are still on the go to find the perfect remedy for hearing loss but are still far from achieving the goal!!!

Until now, one of the most effective remedies for deafness has been hearing devices or hearing aids.

Therefore, through this article, I’ll tell you what hearing aids are and what you should grab for your hearing loss.

So read till the end to the “ULTIMATE GUIDELINE” of hearing aids!!!!

Hearing Aids: What Is It?

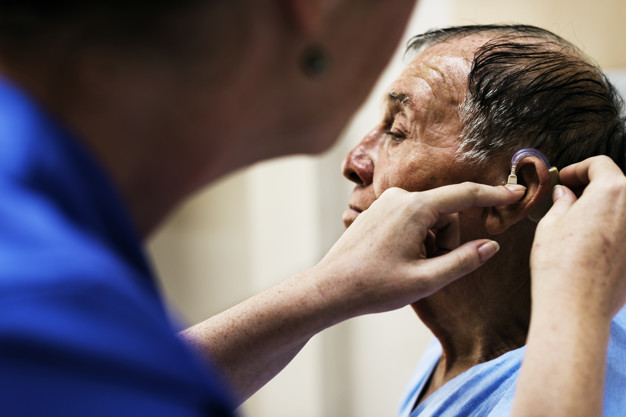
These are small devices that people wear behind their ears. Hearing aids are designed in such a way that they can amplify or make the sounds louder.

Therefore, those who face issues in hearing or communicating can easily use them.

The specialty of these devices is that they can help you hear in both noisy and quiet environments. This device has three different compartments: a microphone, an amplifier, and a speaker.

The microphone captures the sound, converts it into electrical signals, and sends it to the amplifier. The amplifier then boosts the sound and releases it into the ear with the speaker’s help.

These are the essential functions of a hearing aid device, which don’t cost much.

How Can It Help?

The primary job of this device is to help you hear sounds so that you can easily communicate with the people around you.

It can be challenging for many people, especially those with severe hearing loss. Just imagine, there was a time when you used to communicate with your friends and family, but now you cannot communicate at all because you cannot listen to what they say.

Painful, isn’t it?

The same thing happens to those who suffer from such conditions.

But these hearing aids can be a gift to their “soundless lives.” They can hear people speaking, and they also communicate with them.

Before these devices were invented, those who had hearing loss isolated themselves and put them away from environmental communications. That’s because they feel embarrassed to show up in front of the public.

But now, with these hearing devices, they can relive the moments that they thought were lost!!!!

How Will You Know If You Need An Aid?

In this case, you can always go for a check-up with your audiologist, who will help you carry out a hearing test.

These tests can also be carried out online. The benefit of an online hearing test is that you don’t have to go to the clinic; instead, you can take the test just by sitting at home.

But make sure when you are taking these tests the rooms are pin-drop silent. Otherwise, you won’t be able to take the test correctly, and it will affect your test results. Also, keep in mind to use good quality earphones for these tests.

I suggest you go to the clinic and talk with the audiologist directly, as he’ll help you out with this hearing issue!!!! As they are highly professional, they’ll help you with all the ins and outs regarding this matter!!!

Types Of Hearing Aids That You Can Get

There are various types of hearing aids that you’ll find!!!!

These have different features and designs. Each suits another purpose, but one common thing between all these devices is that they will help you hear again.0

Behind-The-Ear:

Behind-The-Ear

These hearing aids are made up of hard plastic, and it’s worn behind the outer ear. All electronic compartments stay behind the ear. The tube that’s connected to the hearing aid is put inside the ear. The sound then passes through the line and into your inner ear.

A new version of the device has no sort of outer fits; instead, it’s open-fit, making it look like a “Bluetooth Earphone.” And this new version of the device is also very reliable!!!

These devices are used by people of all ages who suffer from ”mild” hearing loss or partial deafness.

In-The-Ear:

In-The-Ear

These devices are more high-tech than the behind-the-ear devices. People of all ages also use in-the-ear hearing aids and are only applicable for mild deafness.

The hearing aid is directly connected to the outer ear, and in this device, you’ll also find an extra feature that’s the “telecoil.” Telecoils are tiny magnetic coils that help the user receive the sound through the circulatory instead of the microphone.

This can be very helpful to people, especially when they talk over the phone or are in crowded places.

But it’s highly recommended for adults of all ages but not for young children as the casing of this hearing aid might need to be replaced often as the size of the ear increases.

Canal:

Canal

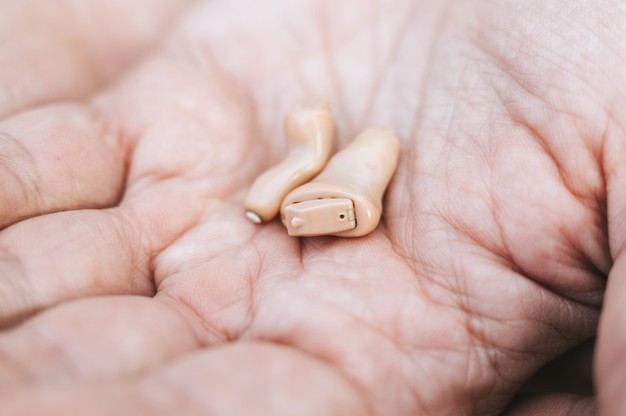
Canal aids come in two forms: the “in-the-canal” and “completely-in-canal.”

The in-the-canal is designed so that it easily fits the shape and size of a person’s ear. The completely in-canal is more advanced as this hearing aid directly fits into the ear canal, keeping it hidden.

The best part of this aid (completely-in-canal) is that people will not see this device; hence, there will be no chance for them to identify whether you are suffering from hearing loss or not.

But the only issue that you might face is adjusting these devices as they are tiny in size. These devices are not usually suggested for young children.

Moreover, this device should only be used for mild or moderate hearing loss and only when your audiologist will recommend it!!!

I hope this article will now give you a complete guide to hearing aid devices!!

Choosing Hearing Aids: 5 Things To Consider Before Buying

You must explore the options of hearing aids you have before you choose something. There’s more to it than just the types of aids available in the market. Here are a few things to remember when choosing a hearing aid.

Get Yourself A Checkup.

First, get your hearing tested and checked by a specialist. If the reason for your hearing problems is temporary, then they’ll help you decide accordingly. But, if it’s because of earwax or infections, then they might rule out the need for one.

Consult With An Audiologist

The best thing would be to take a referral to an audiologist from your doctor. They’ll check your hearing abilities and adjust a device tailored to your needs. This might be for one ear or for both.

Ask For A Trial Period

When getting a hearing aid, make sure that you are buying one with a trial period. This is important since you don’t know if the product you are buying will fit you or not. If it’s not your size or feels discomforting, you may want to exchange it.

That’s why it’s important to know whether there’s a trial aid or not. Also, consider if the amount of the device’s trail period is adjusted to the final price or not. It’s also good to consider if they have a refund policy.

Think For Future Needs

When considering a hearing aid, consider one that’ll work with increased powers. If your hearing capability reduces, you’ll need something better to help you listen. But, if you have to change it, then it’s better to opt for other options.

Check For A Warranty

Some hearing aids provide you with a warranty for a period. Also, in that period, check if you can claim part replacement or get any technical problems solved through their technicians. Warranty periods and terms are also considerable parameters for choosing the right hearing aid.

How Much Does Hearing Aid Cost?

Hearing aids cost around $1000 to $3500. If you are getting one that costs around $3000, then you’re spending around $5.50 to $6 dollar per day for the next 4 years. However, it does not necessarily have to be of the same price since the price range starts at $1000.

Bottom Line

No two products are the same. So, when buying your hearing aid, first consider what helps your health. Take help from your audiologist in choosing the right specifications. Then, take your budget and warranty into consideration. In many cases, you can also get your hearing aids insured when they are expensive.

But the best results won’t come until you keep using them and adjust your hearing capabilities with their help.

Read Also:

A passionate writer and an avid reader, Soumava is academically inclined and loves writing on topics requiring deep research. Having 3+ years of experience, Soumava also loves writing blogs in other domains, including digital marketing, business, technology, travel, and sports.

View all posts

Leave a Reply

Your email address will not be published. Required fields are marked *

Related

aeropress machine

How to Make Coffee with Aeropress Machine

 The Aero press is one of the most straightforward gadgets that you can use to make your morning coffee faster. Invented in 2009 by Engineer Allan Adler, the Aeropress machine has gained popularity due to its small size, high portability and efficient speed in brewing coffee. Due to its portability, you can carry the device to your camping escapade, fishing, or any sporting coffee. With the Aeropress machine, you can have your coffee anywhere at any time. How to assemble an Aeropress machine Remember, you can buy your Aeropress coffee maker from a trustworthy place. Some of the accessories that come with the coffee machine include: The Aeropress device which is a plastic plunger Cap that should get placed at the end of the AeroPress device The fillers which should be used alongside the cap A scoop that should be used to measure the coffee A funnel to put the beans and neatly organize them in the chamber Paddle to be used in stirring the coffee Once you have acquired all the accessories of the AeroPress machine, here is how to assemble the machine: Step 1: Push the plunger of the machine out of the chamber Step2: Remove the filter and put it in the filter cap Step3: By twisting the filter cap, put it into the chamber Step4:  Put the chamber on top of a stand. Put the chamber on a sturdy mug and ensure it stands firmly. Put the ground coffee in the chamber. Step5: Share properly to ensure the coffee is leveled correctly. Step 6:  Add water to the chamber. Ensure the water fill up to level 1. At this point, you are ready to brew the coffee. If you want hot coffee, use hot water, but if you need cold coffee, use cold water. Remember, with the AeroPress machine, the coffee taste is determined purely by the water's temperature. If you use boiling water, it will make your coffee bitter. The manufacturer's recommendation is to use water at 175 degrees. Though it is not practical to achieve the exact temperature, you can boil the water and allow it to cool down before using it. Also, ensure that you use high-quality coffee bean; preferably, coffee beans that have been ground recently. The coffee bean should be finely ground. How to brew coffee If you have everything in place, the process of brewing coffee should take less than two minutes. There are two ways to make coffee using the AeroPress machine; the inverted way, and the usual way. Both methods make delicious coffee, but one is faster. Equipment required Electric stove and kettle The AeroPress machine; stirrer, funnel, and scoop A coffee grinder Small pitcher, or a mug Timer Original method Start by boiling the water. Remember, boil the water and let it cool for a minute since the coffee maker works best at a temperature of 175 degrees. Grind your beans. Depending on the amount of coffee that you want to make, grind the beans accordingly. For the two cups, grind at least two spoonfuls of coffee. Remember, you must grind the coffee until its fine. Ensure the filter is wet. After assembling the Aeropress machine, put paper filler inside the cap. Place the device on top of a mug and dab the filter with warm water. Place the warm funnel on top of a mug and dispense the coffee. After pouring the coffee, remove the funnel. Add warm water. Ensure you add the water until it gets to the marked line in the machine. Remember, the water should be recently boiled and cooled. Using a spoon or a paddle stirrer, stir the coffee until it dissolves. Insert the plunger by pressing it down till a hiss is heard. If you fill any resistance, pause briefly. Push the plunger gently until it reaches the ground. 8. Remove filler cap while pushing the plunger. This should eject the used coffee while rinsing the seal. Dilute and taste your coffee. Depending on how you want your coffee to taste, add more water. The Aeropress machine makes concentrated coffee. Thus you can split the concentrated coffee and make more cups. Reverse method Reverse method is similar to the standard process but with few adjustments. Here is the method: Start by assembling the Aeropress machine. Remember, in this method, and the machine must get assembled in an upside-down manner. Put the plunger in the chamber, flip the device upside-down, and don't put the cap and the filter. Put the funnel and pour the ground coffee. Use fine coffee grits enough for the amount of coffee needed. Next, add boiled water until you fill the filter. Remember, you should boil the water and let it cool for a few minutes. using a spoon or a paddle, stir the coffee gently. Steep the coffee for at least one minute. Place the paper cap and tightly screw it into the chamber Carefully, flip over the machine. Remember, this should get done accurately and quickly. After flipping, place the device on a mug Taste the coffee and dilute as desired. Remember, both ways make concentrated coffee, thus add water until you get the desired coffee. The Aeropress machine features as the most resourceful and most efficient coffee maker. It is less fussy and makes minimum noise; hence, you can use in places that require minimum noise. The machine is also highly affordable, with some brand costing less than twenty dollars on amazon. It is light and highly durable; thus, it can last long and give you value for money. It is easy to assemble and clean, even if you don't have any technical knowledge. The only downside of this machine is that you can only make two cups of coffee. Thus, if you are hosting a party, or your household has more than two people, then you will be forced to make the coffee several times. How to make coffee: [embed]https://www.youtube.com/watch?v=jlCUYNe9pes&t=100s[/embed] Read Also: 10 Best Coffee Places In The US How You Can Create A Coffee House Experience In Your Own Home 7 Fantastically Unusual Uses Of Old Coffee Beans Monthly Best Coffee Subscription

READ MOREDetails
Soldering Iron

How to Use a Soldering Iron

Of all techniques and methods used to join surfaces, metal sheets, Iron, and other objects together, soldering is highly preferred because it does not cause any type of damage to the items being joined together. This is because the solder used to stick them together has a lower melting point than most metals and it offers durable yet reversible bonds between the items. In addition to that, although there are a few key differences between the two types of soldering gear used, they share a similar trait and they’re both easily operable, which we will discover more in this article What Is Soldering? There are several types of soldering using different filler metals called solder, but, they all use the same concept which is heating a filler metal between two items so that it melts and fills the seam between the two items. Soldering is done using either individually bought soldering gear, which allows you to choose the type of tool that is most suitable for the project you are planning to work on, or a soldering station which usually is a standard combination of a soldering iron and a power supply. Soldering Iron  In order to learn how to use a soldering iron, one must first know its basic parts and the science behind its mode of operation. It is simply a tool that connects to a power supply, it consists of a handle that doesn’t conduct heat and a tip that heats up very quickly to high temperatures so it can melt the solder, it also cools down fast. To Be More Specific, The Main Parts Of Soldering Iron Are: Soldering tip: All soldering irons contain iron tips which are the only part that heats up; it doesn’t ooze out the solder as most people think, it simply heats the metals being joined so that when the solder is applied, it melts, but more often than not, the solder would stick on the tip. Luckily, most tips are interchangeable so, you can replace your tip in case of damage or in case you need a specialized tip to suit your uses; bear in mind that tips vary in size and shape, thus, they vary in their uses as well. Wand: The wand is the handheld part of the iron that the tip is attached to. It can be made from a large number of materials that poorly conduct heat or isolate it completely so as to prevent heat from the tip from transferring to the part where the wand makes contact with the skin. Inside the wand, there are wires and metal contacts that conduct and convert the electricity from the power outlet to heat. The contradicting functions of a wand are the reason why most people prefer to buy high-quality wands from renowned brands. Of course, there are other extras and accessories like brass sponges, cradles, and tip tinner which can be purchased individually or found in soldering stations which is actually one of the advantages of soldering stations; but, the two main parts will always remain the tip and the wand. Step 1: Safety First of all, before using a soldering iron, you must be familiar with standard safety precautions since the iron tends to get really hot; not to mention the fact that solder is literally molten metal. So, it would be smart of you to wear protective gear such as; safety goggles and protective gloves, because your fingers are most likely to come into contact with the tip during the first few times. You also should keep in mind to tie your hair and avoid wearing loose-fitting clothes. Moreover, it is preferable to work in a well-ventilated area since some types of solder contain lead which produces toxic fumes, it is also important to thoroughly clean your hands after handling lead-based material. Step 2: Preparing The Tip The tip should be regularly cleaned of any old solder because when old solder solidifies, it turns into a heat isolator due to oxidization resulting in a totally inefficient and highly wasteful soldering process. Not only that but also, slow heating means that you will have to hold the iron to the items being joined for a longer time; it would be highly inconvenient for you and very damaging for sensitive objects like PCBs. So, when the iron is fully heated, softly drag the tip against a sponge to remove old solder. You want to aim for a shiny tip. After cleaning the tip, you should “tin” the tip; to make it last longer and conduct heat better through newfound layers of solder. Same as above, on a fully heated iron, apply a little piece of solder and lightly coat the tip with tinner; then, immediately start soldering while cleaning and tinning the tip between every couple of joints for maximum conductivity and efficiency. Step 3: Actual soldering With your dominant hand holding the iron and the other holding a piece of solder, touch the area where the object comes into contact with the solder and hold it there for about a second then slide the solder underneath the tip while pushing the solder rod further according to how much solder you need. Then, make sure to pull back the solder first while holding the tip in position until all the solder melts; it usually takes about five seconds or less. Solder cools down fast so, you will not need to blow on the joint since it will only lead to a weak joint which can be identified by its oxidized, unclear, and grainy appearance. What you want to get is a smooth connection, not a lump. Finishing touches : After you’ve had enough soldering for the day, clean and in the tip again before you put it into storage, it helps increase its lifespan. As you may have noticed, soldering is not that hard of a task, it only requires soldering gear, steady hands, and concentration. So, go ahead, start soldering, and don’t be afraid to get creative. Read Also: Is Polyester Stretchy? – Its Materials & Properties [Detailed Explanation] Top 6 Different Types Of Scarves Names And Its Benefits How to Thicken Chili – Tried and Tested

READ MOREDetails
headphones vs earbuds

Headphones vs Earbuds: How to Choose for the Best Music Experience

Are you looking for the best way to listen to your music? Most phones come bundled with a set of earphones but these are often of poor quality. The next step is to either buy a new set or to invest a little more for a headset. Which one is better? Choosing between headphones vs earbuds is a lot more complicated than some people think. Only a few people know this, but choosing the right extension enhances your experience tenfold than when you opt for the other choice. Your choice determines how comfortable you are, how deep and resonate the sounds are, and it affects portability too. Having a hard time knowing which one suits you better? Read what we have below to find out. We’ll help you find out which is better for you with the help of this earbud and headphone buying guide: 1. Earbuds: Despite the different types of earbuds though, they tend to follow a similar basic look. Earbuds are 2 devices connected to wires that extend to fill your ear canal. The way they extend into your ear canal aids you in hearing the bassline of what you’re listening to. This makes them perfect for people who enjoy listening to bass-heavy music nowadays. That’s not the only reason why most people tend to decide to buy earphones. Convenience is also another reason why most people prefer earphones. They’re small and easy to carry when you’re on the go. You can also put them away with ease as all you need to do is gather their wires and bundle them together. Speaking of wires, some of them don’t have them anymore. Since earphones are a popular choice among the general populace, a lot of research and development goes towards making them better for their users. This leads to many forms of wireless earbuds. Yes, it’s true that there may be complications in using wireless earbuds. There is no denying though that they give an unmatched experience when you’re listening to music with them. People love earbuds because they tend to be cheaper too. You can find high-quality earbuds for a fraction of the price headphones cost with ease. In fact, there’s a blog about the best earbuds that are below $10. Check it out now! 2. Headphones: Headphones often take up a big part of the user’s head when they wear them. This makes them bulkier than earbuds, thus harder to pack up and use on the go. The added bulk doesn’t come without some added features though. Instead of going into your ear canal, headphones rest around the outside of your ears. While you won’t be able to hear basslines as well with this setup, this allows acoustic sounds to become more accentuated. This makes them better for people who need to be attentive in listening to audio files for a project or for work. Like earbuds, there are also wireless versions of headphones. Bluetooth headphones tend to produce top of the line quality for sound. This makes them one of the top electronic gadgets to buy this year. Another reason why people love headphones is that they have a noise-canceling feature. Because they cover the entire outside of the ear, headphones guide the sound around them, reducing the ambient noise that users hear. This gives some people some degree of privacy as they feel like they’re in their own world. Make a Choice Between Headphones Vs Earbuds Today: Choosing between headphones vs earbuds can be a tough decision to make. Use our guide to help you find out which one is better for you. Get your own pair today! Why stop here? We’ve got other guides for you to read. If you’re not buying for yourself, then you’re likely buying for your nephew, niece, or child. This is because they’re a popular choice as gifts for children. Check out our guide to buying gadgets for kids to learn more about it. Read Also: Important Habits To Protect Your Ear Health And Hearing The 10 Best PC Gaming Desk Accessories In 2018

READ MOREDetails