How To Troubleshoot The Alexa Not Responding Issue? [Fixed]

Published on: 20 March 2021 Last Updated on: 27 December 2024
Alexa device issue

Alexa is a virtual assistant, which works with an echo dot in order to fulfill all the demands of its users. With its thousands of attractive features, Alexa has made the life of its users super easy and also entertaining at the same time. 

With its hi-tech features, Alexa can do almost everything from controlling smart home lights to set reminders, playing songs, jokes, news, quizzes, and much more things. But due to some reasons, you may find your Alexa not responding to the commands that you are giving it. 

Do not worry if you are facing the Alexa not responding issue. Here we have the most effective and easiest troubleshooting steps to fix this issue. 

Troubleshoot The Alexa Not Responding Issue:

Troubleshoot The Alexa imageHere are the troubleshooting steps that you need to follow for solving the Alexa not responding issue with your echo dot. There are a bunch of reasons for what you may be facing this Alexa not working issue. 

So, let’s head towards the troubleshooting steps. 

1. Check The Microphone Button

There are many instances when we find that the reason behind Alexa not responding is because the microphone is damaged or we forget to turn the button on. The microphone button is one of the most common reasons for this issue. 

So, check the microphone button first. If the issue persists and it seems that everything is totally fine there. You can step to the next process. 

2. Reboot The Device

This is one of the most effective and easiest ways in the whole troubleshooting process of Alexa is not responding issue. There is not much trouble, all you need to do is just restart the device and the issue will get resolved. But this restarting has a definite name called power drain, and it is more than just powering off the power button and power on it again. 

Here is the step-by-step guide for the power drain process.

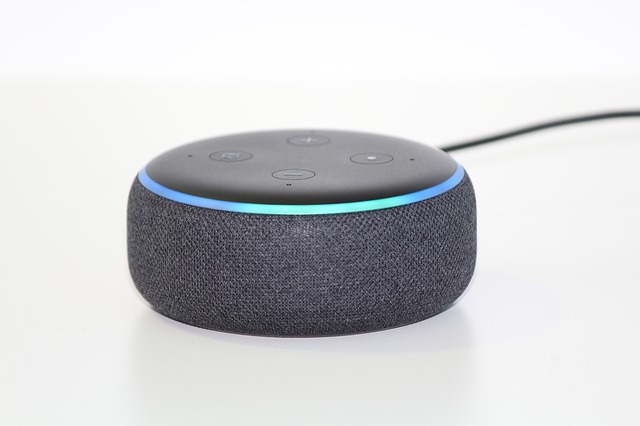
  • First, you need to check the power light. In case it is showing blue light, that means the device is able to hear you but simply the Alexa device is unresponsive to your commands. 
  • Disconnect the power cable from the power source for at least 30 seconds.
  • Wait for a little while, and after that, connect the power cord again with the power outlet.
  • Now, when your device is ready completely, try to give it any command again.
  • If the issue is resolved, then it is fine. But in case the issue of Alexa not responding continues, head to the next step. 

3. Echo Dot Hard Reset

In case the above described troubleshoot does not work for your echo dot. Here is the step-by-step guide to hard reset.

  • You will find the reset button at the bottom of the device. You can use a pin to press the button.
  • As soon as you press the button, the device will power off.
  • Here, you need to wait for a little and then power the device on again.
  • All the settings of the device will then reset to the original. 

4. Disable And Enable Alexa Privacy

If Alexa not responding after all the above-mentioned troubleshooting steps, now is the time to enable Alexa privacy and in order to do so, follow the below steps.

  • You will find a button at the end of Alexa’s nucleus screen. You need to press the button.
  • This button is to enable the privacy of Alexa. If you press the button again, the device will hear you again.
  • Give a command to Alexa in order to check whether the issue is resolved or not. 

5. Check Your WiFi Connection

Behind the “Alexa not responding” issue, there is a huge chance that maybe your wifi connection is not working properly. That is why Alexa is finding it difficult to respond to your commands. 

Well, let me tell you that if you do not have a proper internet connection, there will be no use for this Alexa device. So, check the router now. In case you find anything wrong, contact your network service provider. 

6. Try Changing The Position 

In case you have placed your echo dot device far from your router or in someplace where it is having issues connecting with the router. This can be the main reason why you are experiencing “Alexa not responding.” 

Make sure that you are placing Alexa within the wifi range. The place should be accessible to yours as well so that your echo dot device can connect with the network properly and also can hear you clearly. 

7. Set Echo And Smartphone On The Same Network

Always keep in mind that the smartphone that you are using and Alexa have to be connected within the same network. In case they are connected with different routers or your phone is not connected with the router’s network, you will face the “Alexa not responding issues.” Connect both of them on the same router’s network in order to resolve the issue. 

8. WiFi Congestions

If you have connected a lot of devices within the same router’s network, it may create the “Alexa not responding” issue. Due to excessive wifi congestions, your echo dot is not able to respond to your given commands. Remove or disconnect some other devices, and then try to give your device command and check if the issue is resolved. 

Still Alexa Not Responding?

All the steps that I have told you in this troubleshooting guide are enough for resolving Alexa not responding to voice issue. But if you face the same problem after performing all the troubleshooting steps. You should contact Alexa customer care. Call on the Alexa helpline number and ask for help. 

More Resources: 

Mashum Mollah is the feature writer of Search Engine Magazine and an SEO Analyst at Real Wealth Business. Over the last 3 years, He has successfully developed and implemented online marketing, SEO, and conversion campaigns for 50+ businesses of all sizes. He is the co-founder of Social Media Magazine.

View all posts

Leave a Reply

Your email address will not be published. Required fields are marked *

Related

Soldering Iron

How to Use a Soldering Iron

Of all techniques and methods used to join surfaces, metal sheets, Iron, and other objects together, soldering is highly preferred because it does not cause any type of damage to the items being joined together. This is because the solder used to stick them together has a lower melting point than most metals and it offers durable yet reversible bonds between the items. In addition to that, although there are a few key differences between the two types of soldering gear used, they share a similar trait and they’re both easily operable, which we will discover more in this article What Is Soldering? There are several types of soldering using different filler metals called solder, but, they all use the same concept which is heating a filler metal between two items so that it melts and fills the seam between the two items. Soldering is done using either individually bought soldering gear, which allows you to choose the type of tool that is most suitable for the project you are planning to work on, or a soldering station which usually is a standard combination of a soldering iron and a power supply. Soldering Iron  In order to learn how to use a soldering iron, one must first know its basic parts and the science behind its mode of operation. It is simply a tool that connects to a power supply, it consists of a handle that doesn’t conduct heat and a tip that heats up very quickly to high temperatures so it can melt the solder, it also cools down fast. To Be More Specific, The Main Parts Of Soldering Iron Are: Soldering tip: All soldering irons contain iron tips which are the only part that heats up; it doesn’t ooze out the solder as most people think, it simply heats the metals being joined so that when the solder is applied, it melts, but more often than not, the solder would stick on the tip. Luckily, most tips are interchangeable so, you can replace your tip in case of damage or in case you need a specialized tip to suit your uses; bear in mind that tips vary in size and shape, thus, they vary in their uses as well. Wand: The wand is the handheld part of the iron that the tip is attached to. It can be made from a large number of materials that poorly conduct heat or isolate it completely so as to prevent heat from the tip from transferring to the part where the wand makes contact with the skin. Inside the wand, there are wires and metal contacts that conduct and convert the electricity from the power outlet to heat. The contradicting functions of a wand are the reason why most people prefer to buy high-quality wands from renowned brands. Of course, there are other extras and accessories like brass sponges, cradles, and tip tinner which can be purchased individually or found in soldering stations which is actually one of the advantages of soldering stations; but, the two main parts will always remain the tip and the wand. Step 1: Safety First of all, before using a soldering iron, you must be familiar with standard safety precautions since the iron tends to get really hot; not to mention the fact that solder is literally molten metal. So, it would be smart of you to wear protective gear such as; safety goggles and protective gloves, because your fingers are most likely to come into contact with the tip during the first few times. You also should keep in mind to tie your hair and avoid wearing loose-fitting clothes. Moreover, it is preferable to work in a well-ventilated area since some types of solder contain lead which produces toxic fumes, it is also important to thoroughly clean your hands after handling lead-based material. Step 2: Preparing The Tip The tip should be regularly cleaned of any old solder because when old solder solidifies, it turns into a heat isolator due to oxidization resulting in a totally inefficient and highly wasteful soldering process. Not only that but also, slow heating means that you will have to hold the iron to the items being joined for a longer time; it would be highly inconvenient for you and very damaging for sensitive objects like PCBs. So, when the iron is fully heated, softly drag the tip against a sponge to remove old solder. You want to aim for a shiny tip. After cleaning the tip, you should “tin” the tip; to make it last longer and conduct heat better through newfound layers of solder. Same as above, on a fully heated iron, apply a little piece of solder and lightly coat the tip with tinner; then, immediately start soldering while cleaning and tinning the tip between every couple of joints for maximum conductivity and efficiency. Step 3: Actual soldering With your dominant hand holding the iron and the other holding a piece of solder, touch the area where the object comes into contact with the solder and hold it there for about a second then slide the solder underneath the tip while pushing the solder rod further according to how much solder you need. Then, make sure to pull back the solder first while holding the tip in position until all the solder melts; it usually takes about five seconds or less. Solder cools down fast so, you will not need to blow on the joint since it will only lead to a weak joint which can be identified by its oxidized, unclear, and grainy appearance. What you want to get is a smooth connection, not a lump. Finishing touches : After you’ve had enough soldering for the day, clean and in the tip again before you put it into storage, it helps increase its lifespan. As you may have noticed, soldering is not that hard of a task, it only requires soldering gear, steady hands, and concentration. So, go ahead, start soldering, and don’t be afraid to get creative. Read Also: Is Polyester Stretchy? – Its Materials & Properties [Detailed Explanation] Top 6 Different Types Of Scarves Names And Its Benefits How to Thicken Chili – Tried and Tested

READ MOREDetails
GoPro camera

Do You Need a GoPro Nowadays? Is It Worth Buying?

The world has seen astonishing advancements in technology in the last two decades. Like other fields, photography continues to evolve with time. From lighting to cameras, everything has changed for the better. One significant progress is the GoPro camera. The invention of GoPro created a buzz in the world of photography. Everyone was thrilled to know about its incredible features. From portability to wearability, every aspect is fascinating. It has revolutionized the scope of photography and taken it to the next level. After many years of its launch, some people are still unsure whether GoPro is worth the hype or not. This blog will give you an insight into the strengths and weaknesses of the GoPro camera. A. Pros of a GoPro Camera: 1. Small and Lightweight: One of the biggest advantages of GoPro is its portability. It does not require a lot of space in the luggage, and you can fit it in your pocket. Its accessories, like the charger, remote and mount, are also small and lightweight. Source: Pinterest 2. Wearable: The biggest wish of every adventurer is to capture shots of his crazy experiences. The invention of the GoPro camera made this wish come true. You can wear it on any part of your body from head to toe and capture amazing scenes. If you want to shoot moments in water or mid-air, GoPro is the best choice. Source: Pinterest 3. Durable: The GoPro camera is durable which makes it an ideal choice for daredevils. Despite its small size, the GoPro camera is quite strong and capable of bearing immense pressure. Source: Gadget Review 4. Waterproof: The waterproof feature of GoPro is a blessing for all the adventure junkies. You never know how the conditions turn out to be when you travel outdoors so this quality can be helpful. Whether you want to make an underwater video or take a photo in rain or snow, GoPro can do everything. Source: Pinterest 5. HD Videos: Even though the GoPro camera is not built for high-tech functionalities, it surprisingly has some impressive features. One such feature is the high definition video. You can make action videos of excellent image quality and color grading under different lighting conditions. GoPro cameras also come with a built-in stabilization feature to produce crystal clear streaming videos. Source: Cultofmac 6. Wide Angle Shots: Another fascinating feature of the GoPro camera is its ability to take wide angle shots. It has an ultra-wide fisheye look which enables it to capture a broader view in the frame.  It is suitable for landscapes where you want to capture all the objects of the view. You have to come closer to the target to get a perfect shot. Read more about using the fisheye effect here. Source: Digital Trends 7. Wi-Fi Connectivity: Wi-Fi connectivity is a feature that enhances the effectiveness of GoPro. It comes with a Wi-Fi remote that can help you connect to the internet anytime. This will allow you to access the GoPro app where you can use helpful tools to enhance your photos. B. Cons of a GoPro Camera: 1. Battery Life: One of the most significant issues of a GoPro camera is its short battery life. If used regularly, its battery drains out within a few hours. If you are planning to use GoPro during traveling, you should carry a charger; otherwise, you are in trouble. There are ways to fix the battery problem. Like you can use an external battery pack or a battery with a longer lifespan. If you want an all-in-one solution to your battery needs, V-mount batteries are the way to go. Source: How to Geek 2. Responsiveness: Lack of responsiveness of the GoPro camera is an area of concern. Manual controls of GoPro camera are not that convenient. It has a loose shutter, and the software is not that user-friendly. The customization options of GoPro cameras are limited, and they are also not easily accessible. Source: Techspot 3. No Zoom: Another drawback of the GoPro cam is that it does not offer a zoom feature. This means that if you want to get an intimate shot of an object, you have to get closer to it. Source: Video Studio Pro 4. Color Balance: The image quality of the GoPro camera is excellent in brightness, but things can get a bit cloudy in low light. If you take a shot of sunset or sunrise from a GoPro, the result might not come up to your expectations. It does not provide a uniform blend of colors when there is uneven lighting in the shot. Source: GoPro Is GoPro Worth Buying? The main question is yet to be answered whether GoPro is worth buying or not. People will have contradicting views on this question. If you analyze all its pros and cons, you will find out that its positives edge out the negatives. Plus, its price is way less compared to other cameras in the market. Another reason which makes it a good choice is its wide scope and convenience of usage. Conclusion: GoPro is one of the biggest inventions in our generation. With its unique design and excellent features, it has made a mark in the market. It allows you to capture shots of real-time action and can be an exciting addition to your gadget collection. After considering all the aspects, it is safe to say that if you plan to buy a GoPro camera, then you should do so.  It’s definitely worth buying! Read Also: What Is A CMOS Camera? Best Deer Hunting Trail Camera Tips For Scouting Wildlife How To Pick The Best Trail Camera 2019 “Best Guide For The Users”

READ MOREDetails
Best Gadgets for Teachers

7 Best Gadgets for Teachers in 2020

Gone are the days when the teacher only needed a board and chalk to hold lectures. Sure; you could try doing that. But don’t expect today’s generations of students to be engaged with such an approach. You must know the best gadgets for teachers in 2020. As a student in a modern classroom, you have to use contemporary methods of teaching. That involves using the specific best gadgets for teachers that help you show the things you want to explain. 7 Best Gadgets for Teachers: Let’s see: what are the best gadgets for teachers should use in classrooms? 1. Acer Pico C120 Projector: You don’t have a lot to invest? The most advanced best gadgets for teachers cost a lot of money, but this simple projector comes for less than $200. It’s small and portable so you can bring it to the classroom(as classroom gadgets) whenever you need it. The school can invest in a few of these projectors, and all teachers can use them. Projectors are cool because they show things on a big platform. The computer screen is not big enough for everyone to see. If, for example, you’re chatting with the writer from a term paper writing service trying to get essay writing tips, you may display the instructions through the projector in real-time. 2. NumonicsIntelliboard Interactive Whiteboard: The blackboard no longer works. When there’s a solution so advanced as this Intelliboard, there’s no going back. It’s an expensive gadget (it costs over $1300 on a discount), so it’s probably something the school or a donor should provide for the classroom. The NumonicsIntelliboard acts as a computer and a board at the same time. And so much more! You can write and draw on it, and you can save the designs as notes on your computer. It holds advanced educational content software that lets you develop lesson plans. You’ll get free online instructions on how to use it, and it doesn’t have a huge learning curve. 3. Catchbox: This is a microphone that you can throw and catch. It’s perfect for interactive and collaborative activities in the classroom. Let’s say your students should complete an academic assignment together. They will pass around the Catchbox, each giving ideas and arguments. Then, they will compose sentences together. 4. Mophie Powerstation: A modern teacher needs their laptop, tablet, and smartphone. They need to stay connected, but they also use these devices in the classroom. So it’s important to have a backup charger all the time. The MophiePowerstation is a portable battery with two USB ports, which allow you to charge different devices. 5. Rocketbook Everlast: Throughout a single day at work, you write more custom notes than you probably should. You’ve written several notebooks over the years and you have no idea what information you have in them. It would be too hard to find the detail you need. The Everlast notebook changes that. It’s just like a notebook, but it’s a digital device. It changes the concept of note-taking. It’s more comfortable than your smartphone or tablet since you’re writing instead of typing. And let’s be honest, if you are a pregnant teacher, BABY BRAIN is the last thing you want your students to catch onto, so having a nifty notebook like this will do wonders. You can also use it as a tool to teach as teachers gadgets academic writing. You already know that almost every student uses an affordable custom writing service when they get stuck with a project. To prevent that from happening, you should make them fall in love with writing. This device shows them that being a writer is actually cool. 6. Wear OS by Google: Still, resisting the smartwatch? It may be because Apple’s watch looks hideous. It’s not classy at all. Google fixed that! Wear OS looks more like a traditional watch, but it’s packed with features that make you a more effective teacher. It will give you reminders synchronized with your Google calendar. You can check the digital wallet or even pay through your watch. If the phone rings in the middle of a lecture, you’ll be able to control it through the watch, so you’ll avoid frantically searching for it. You can choose between many different models, so you can be mindful of your style and retain the status of the coolest teacher at school. 7. AmScope MD35 Microscope Imager Digital USB Camera: Do you remember the days when your chemistry and biology teachers made you go to the microscope, one by one? You couldn’t wait for your turn and then you saw it… nothing. You couldn’t see anything because the microscope wasn’t focused well on your eyes. Today, you have a better microscope in the classroom. But the process of getting one student after another to see something is still a waste of time. With this digital USB camera, you’ll show what’s going on on a big screen. These are the cool gadgets for teachers in 2020. Do You Want to Be the Best Teacher You Could Be? The perfect gadgets make you look cool. When you have the “cool” appeal for students, they are more willing to pay attention to what you’re saying. But the devices also help you to deliver more effective instructions. Students love technology, and you have access to such tech gadgets for teachers that makes the teaching process effortless. It’s an offer you can’t refuse, and if you need help financing this kind of equipment, a title loan could help you. Read Also: 5 Awesome Gadgets For Your Office Your Guide In Buying Kid-Friendly Gadgets Top 5 Electronics Gadgets To Buy From Amazon US

READ MOREDetails